Construction
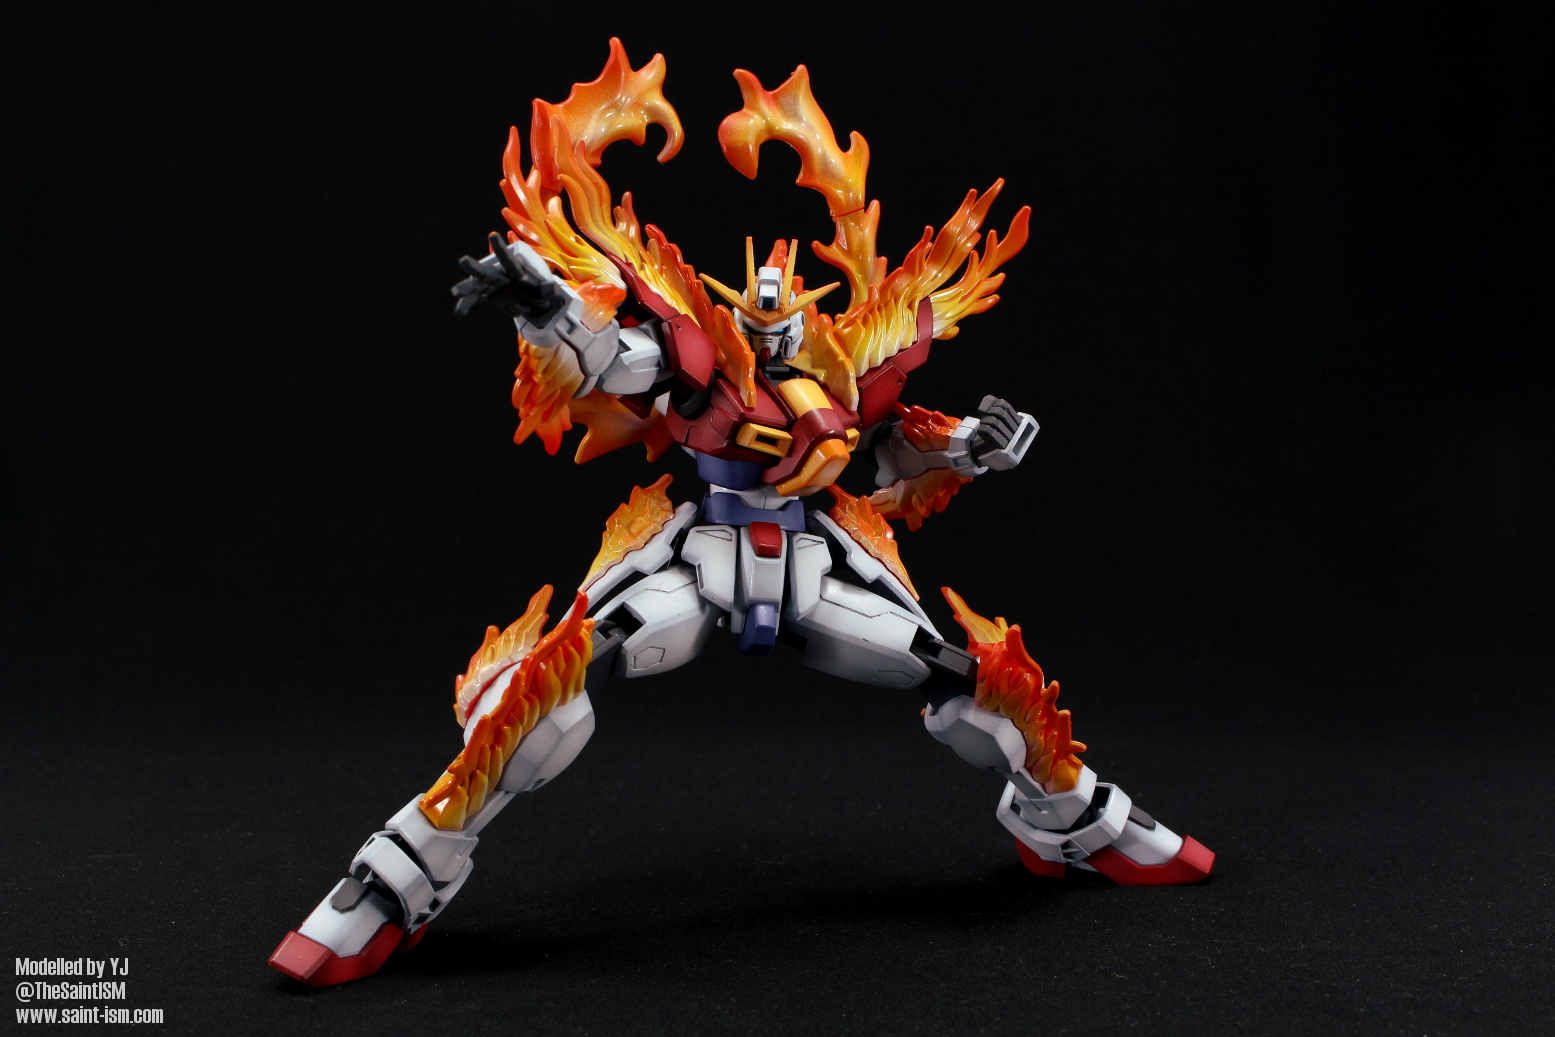
I’m still getting the hang of building HGs so it’s hard for me to comment on standards…but by gawd, this is one of the most posable kits I’ve ever seen. What I really love though is that after you’ve built it, it feels like you get a lot of extra stuff even though the design of the MS itself is pretty simple. You get like 5 pairs of hands, and a tonne of clear effect parts to simulate the Burning Burst System.
My only real complaints are that the foot isn’t double jointed, and that the calves can’t quite reach the thighs when crunching, but apart from that the joints are more than capable of doing plenty of fighting poses which makes my paintjob weep. Equipping all the clear parts also does hinder some of the movement and make it kinda clunky to pose.
There are a couple of seamlines, being on the calves, the head and forearms. I only opted to fix the one on the calves.
Painting


I love HG kits with minimal stickers, and the HG Try Burning is one of them. The only part that really needs to be masked off are the grey parts on the feet.
All paints listed are from the Gunze Mr Hobby acrylic line unless stated.
White – Base coat of Intermediate Blue (100%), followed by two coats of White (100%) for highlights/shading
Red – Base coat of Black (100%), followed by White (100%) for preshading. Next a coat of Shine Red (60%) + Red Madder (40%). A tiny bit of White and Orange is then added for highlights.
Yellow – Base coat of Orange (100%), followed by White (100%) for preshading. Then a coat of Orange Yellow (70%) + Yellow (30%). Finally, White is added for highlights
Frame grey – I just used Tamiya TS-4 German Grey spray paint.
Painting the effect parts
At first this wasn’t something I was sure if I would do or not. After seeing images of the Try Burning with the stock effect parts equipped, it looked much like a giant orange blob, so I decided to take the plunge and see what I could do with no regrets.
I started off by priming the parts, which was pretty scary since it was pretty much a point of no return for me. I then started off by doing a coat of white, as this represents the hottest part of the flame, then by building up shades of yellow, orange, and then red at the very edges.


I love that flame effect, it looks fantastic.
Awesome your painting the effect parts, it look good.